Important: The GCConnex decommission will not affect GCCollab or GCWiki. Thank you and happy collaborating!
Federal Youth Network/Zoom Events Instructions
Connecting to audio in Zoom Webinar / Connexion à l'audio dans Zoom Webinar (anglais seulement): https://support.zoom.com/hc/en/article?id=zm_kb&sysparm_article=KB0061902
If you want to use your personal email, please re-register for CBC using your preferred email address / Si vous souhaitez utiliser votre adresse e-mail personnelle, veuillez vous réinscrire à CDC en utilisant l'adresse e-mail de votre choix: https://events.zoom.us/ev/Ak0I_hpxH4rh8NFwL4SCE2FAXJMjENNTLYDEhhSzF-Q8sPA5MqfK~AgIc4d4t6VqyMcpfQxRi4zXk2PQWpWhguIFLatoA-slLNxWK1-nYA95OHA
How to cancel your ticket / Comment annuler votre billet : https://support.zoom.com/hc/en/article?id=zm_kb&sysparm_article=KB0069114
Oops page problem / Problème de page Oops:
This is because you need to log into Zoom Events with a Zoom Account that has the same email address that the ticket was sent to. For example, if the ticket was sent to your government email but you signed into a Zoom Account with your personal email, it will not work. If you want to register using your personal email please do so here: https://events.zoom.us/ev/Ak0I_hpxH4rh8NFwL4SCE2FAXJMjENNTLYDEhhSzF-Q8sPA5MqfK~AgIc4d4t6VqyMcpfQxRi4zXk2PQWpWhguIFLatoA-slLNxWK1-nYA95OHA
If you made a Zoom Account with your government email and the link to Zoom Events is still not working (brings you to an Oops page) it is because you are auto-logged into a different account.
Please go to https://events.zoom.us/ log out, and sign back in using the same Zoom Account that the ticket was sent to. If you don’t have an account with that same email, please make a new Zoom account.
///
En effet, vous devez vous connecter à Zoom Events avec un compte Zoom ayant la même adresse e-mail que celle à laquelle le ticket a été envoyé. Par exemple, si le billet a été envoyé à l'adresse e-mail de votre gouvernement mais que vous vous êtes connecté à un compte Zoom avec votre adresse e-mail personnelle, cela ne fonctionnera pas. Si vous souhaitez vous inscrire en utilisant votre adresse e-mail personnelle, veuillez le faire ici : https://events.zoom.us/ev/Ak0I_hpxH4rh8NFwL4SCE2FAXJMjENNTLYDEhhSzF-Q8sPA5MqfK~AgIc4d4t6VqyMcpfQxRi4zXk2PQWpWhguIFLatoA-slLNxWK1-nYA95OHA
Si vous avez créé un compte Zoom avec votre adresse e-mail gouvernementale et que le lien vers Zoom Events ne fonctionne toujours pas (vous amène à une page Oops), c'est parce que vous êtes automatiquement connecté à un autre compte.
Rendez-vous sur https://events.zoom.us/, déconnectez-vous et reconnectez-vous en utilisant le même compte Zoom que celui qui vous a envoyé le ticket. Si vous n'avez pas de compte avec le même email, créez un nouveau compte Zoom.
Zoom Events Attendee Instructions - ENG
*We recommend you use a personal device
- You will receive an email from Zoom Events with the title “You are registered for Career Boot Camp 2024 | Camp de carrières 2024”. (Please check your junk folder). This is your ticket to the Zoom Events platform. Every ticket creates a unique URL that is linked to your account/email. Other users will not be able to join the event using your link.
- Click on the “Join” link/button in the email.
- It will open a webpage on your internet browser. This webpage is the Zoom Events Login page. You need to make a Zoom Account with the same email address that your ticket was sent to. Once you make an account, log in to that account.
- You will then arrive at the Zoom Events Lobby for Career Boot Camp. From here, you can explore different features.
- To change the language, go to the top right corner and click on the 3 grey bars or the 3 dots. Go down and click on language.
Sessions - Attending a session
- Go to the three gray lines in the top right corner and then click on “Sessions”.
- You will see all the sessions in English and in French listed for Career Boot Camp. If a session is in progress you will see a blue “Join” button next to the title. Click the “Join” button to enter the session. This will prompt the Zoom App or Desktop Client to open.
*Note that you need the Zoom Desktop App downloaded on your computer/mobile device beforehand.
- Now you have entered the Zoom Webinar as an attendee. You cannot use your camera or microphone. You can however submit questions to panelists in the Q&A function.
Lobby
If you have questions about Zoom Events’ features such as Lobby, Itinerary, Exhibitors, Expo, Speakers, and People, please visit this Zoom Support page: https://support.zoom.com/hc/en/article?id=zm_kb&sysparm_article=KB0062869#h_01FSQNA1WQA764KEF3MQCNNHVX
- Go to “Expo” tab in the Lobby menu
- You have now entered the Expo Floor.
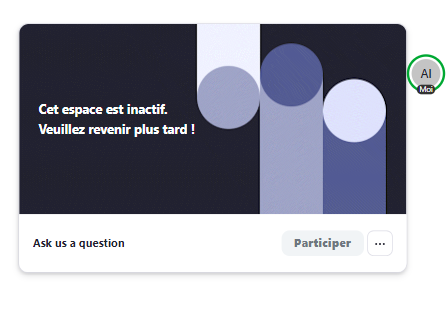
- You can move your avatar to enter “Booths”. Inside the booth, you will see a description of the GC Community and a logo. You will also see a “Meeting Space”. That is a Zoom Meeting that a representative from a GC Community is hosting. You can enter that meeting to ask the representative questions.Press the blue “Join” button to enter the Zoom Meeting. If the space is inactive, you will not be able to join. You can only join when a representative is in that meeting.
- See more about Expos here.
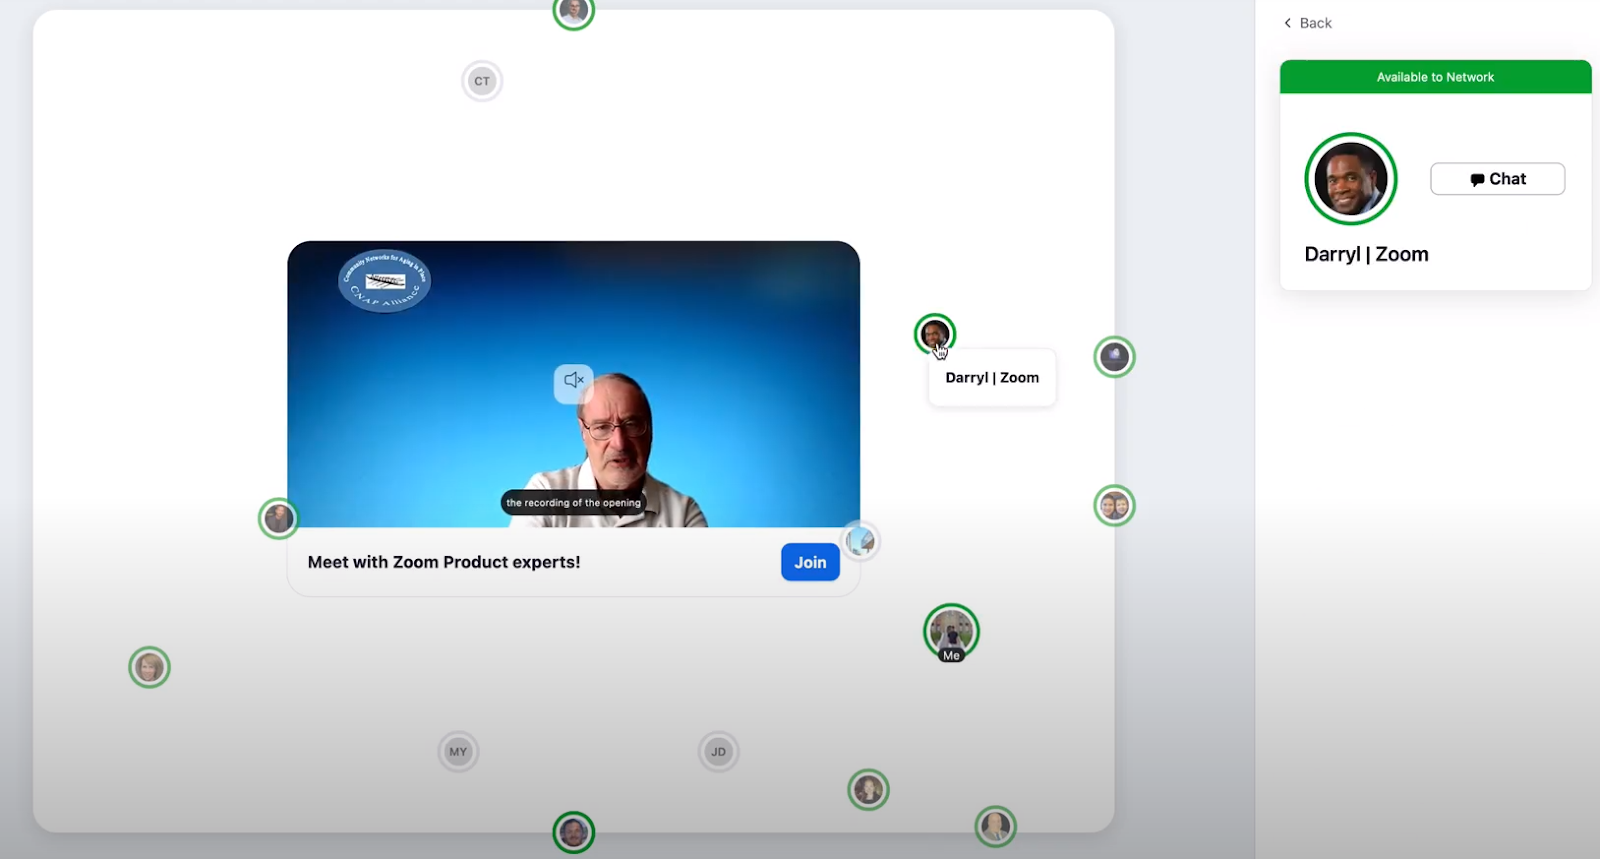
After completing the one-time onboarding flow, you will be placed on the expo floor. By default, your avatar will be placed right above the Welcome area. From here, you can navigate your avatar across the floor by using your mouse or keyboard arrow keys in the following ways:
- To use the mouse, click the location you want your avatar to be. The avatar will move directly to where you clicked. You can 'click-to-advance' and use your mouse to click/navigate through the expo floor.
- You can click and drag the expo floor (and booth floor), moving the floor map within your window.
- When you click and drag the map, your avatar will stay in view and remain in its location. When you click Enter Booth to access a booth, your avatar will move to the selected booth.
- To use your keyboard arrow keys, use the arrow keys to direct your avatar around the expo floor.
- You can also use your keyboard +/- keys, your mouse wheel, your trackpad for zooming (2-finger pinch), or your track =++ pad to zoom in and out of the expo floor.
How to join booth and spaces:
- On the expo floor map, move your avatar to the expo booth that you want to join.
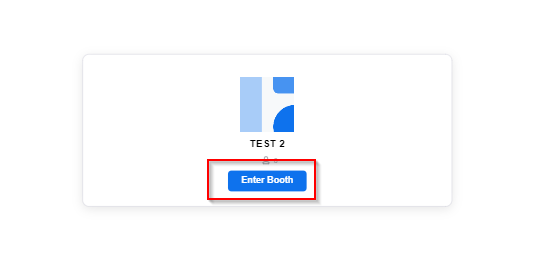
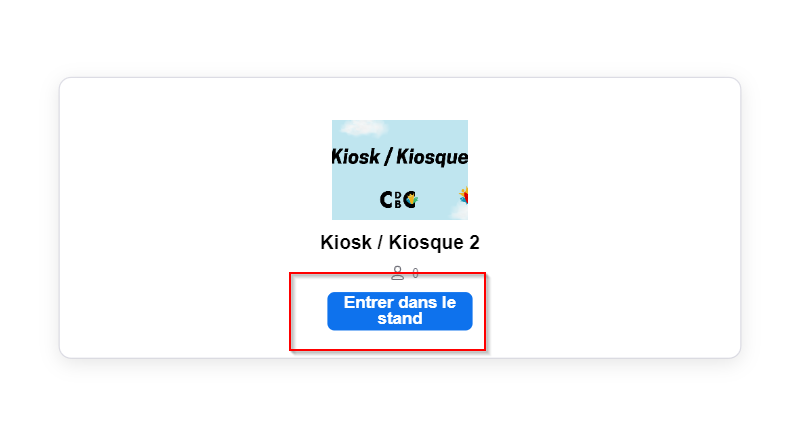
- On the booth, click Enter Booth. You will join other attendees in the booth where you’ll see a meeting space (meeting session) taking place.
- The spaces that are active will display as In Progress
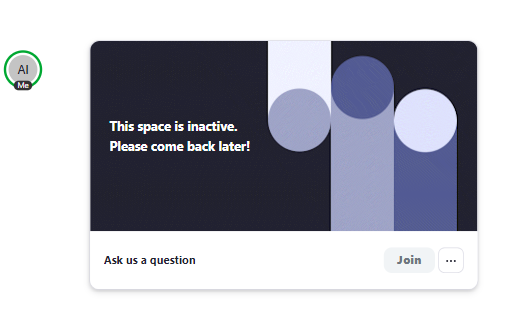
- Inactive spaces will display the message: This space is inactive. Please come back later!. This means that no active sessions are available for you to join.
- On the space that you want to join, click Join.
- To leave the booth, click Leave Booth on the expo toolbar. Your avatar will be placed outside of the booth on the expo floor.
How to Network
Profile cards and People Directory:
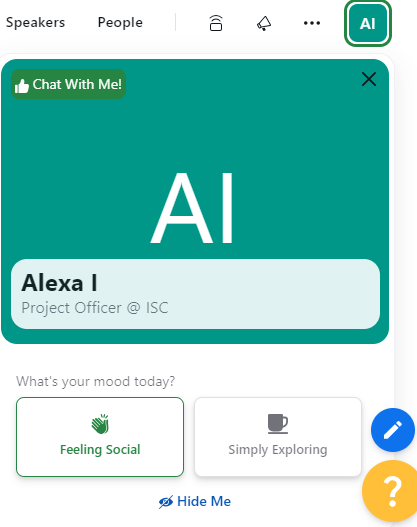
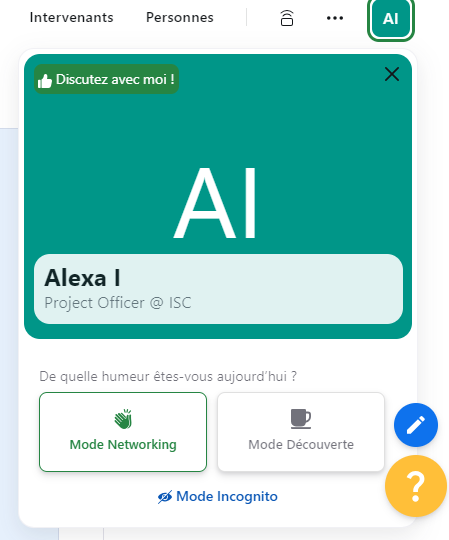
- To edit your profile card. Go to the 3 gray lines in the top right corner, scroll down and click on “profile” (Or just click on the box with your initials in the top right corner). From there you can edit your information.
- This allows other users to look at your profile card under the “People” directory.
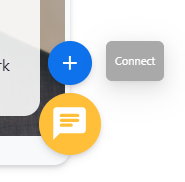
- You can connect with other participants by going to the “People” tab in the menu and click on a profile card and click on the blue circle with the plus sign. You can chat with that person by clicking on the yellow button with the speech bubble.
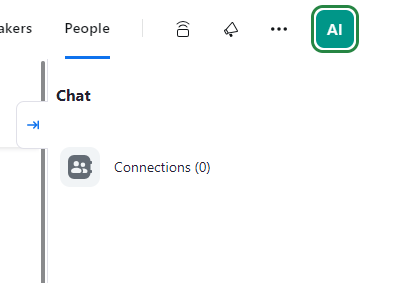
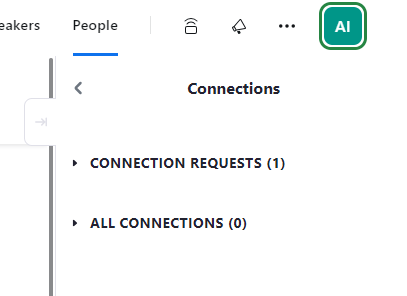
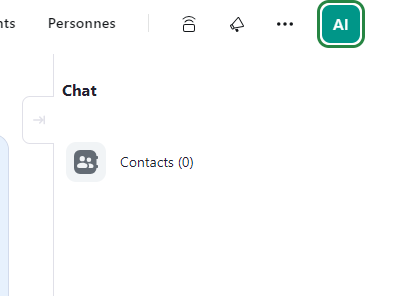
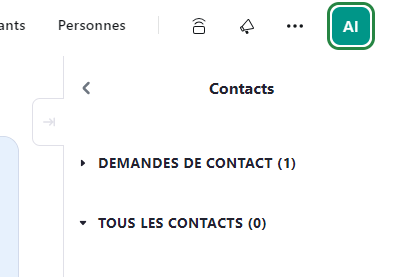
- You can see your connections in the Chat function. See more about connecting with other attendees.
- Find out more about profile cards here and you can find out more about Zoom Events networking and profile terms here.
Networking through the expo floor:
- You can set 3 different statuses for your profile.
- You can set it to:
- “Feeling Social”: Your avatar will display a green ring to let people know you are open to others conversing and networking with you. In addition, your public profile will be displayed in public areas e.g. the event attendee directory.
- “Simply Exploring”: Your avatar will not display a green ring to let others know you are focused on the event, but that you will approach other attendees when you’re ready to. Your public profile will be displayed in public areas e.g. the event attendee directory.
- “Hide Me”: Your public profile will be hidden from public areas e.g. the event attendee directory. Only your display name and initials will be displayed when you participate in events. Other attendees will not be able to find and interact with you unless you initiate contact e.g. you send a message in public chats.
- On the expo floor, you can click on other avatars/profiles and then connect or chat with them
Zoom Events - Instructions pour les participants - FRA
*Nous vous recommandons d'utiliser un appareil personnel
- Vous recevrez un e-mail de Zoom Events intitulé "Vous êtes inscrit au Career Boot Camp 2024 | Camp de carrières 2024". (Veuillez vérifier votre boîte de pourriels). Il s'agit de votre billet d'accès à la plateforme Zoom Events. Chaque billet crée une URL unique liée à votre compte/email. Les autres utilisateurs ne pourront pas participer à l'événement en utilisant votre lien.
- Cliquez sur le lien/bouton "Participer" dans l'e-mail.
- Une page web s'ouvrira sur votre navigateur internet. Cette page web est la page de connexion à Zoom Events. Vous devez créer un compte Zoom avec la même adresse e-mail que celle à laquelle votre billet a été envoyé. Une fois que vous avez créé un compte, connectez-vous à ce compte.
- Vous arriverez alors dans le Hall/Lobby de Zoom Events pour Camp de carrières 2024. A partir de là, vous pouvez explorer différentes fonctionnalités.
- Pour changer de langue, allez dans le coin supérieur droit et cliquez sur les 3 barres grises ou les 3 points. Descendez et cliquez sur “Langue”.
Sessions - Participer à une session
- Allez sur les trois lignes grises dans le coin supérieur droit et cliquez sur "Sessions".
- Vous verrez toutes les sessions en anglais et en français listées. Si une session est en cours, vous verrez un bouton bleu "Rejoindre" à côté du titre. Cliquez sur le bouton "Rejoindre" pour entrer dans la session. L'application Zoom ou le client de bureau s'ouvrira. *Notez que l'application Zoom Desktop doit être téléchargée au préalable sur votre ordinateur/appareil mobile.
- Vous êtes maintenant entré dans le webinaire Zoom en tant que participant. Vous ne pouvez pas utiliser votre caméra ou votre microphone. Vous pouvez cependant poser des questions aux panélistes dans la fonction Q&R.
Le Hall /Lobby
Si vous avez des questions sur les fonctionnalités de Zoom Events telles que le Hall, Itinéraire, Exposants, Expo, Intervenants et Personnes, veuillez consulter cette page du support Zoom (en anglais seulement) : https://support.zoom.com/hc/en/article?id=zm_kb&sysparm_article=KB0062869#h_01FSQNA1WQA764KEF3MQCNNHVX
- Allez à l'onglet "Expo" dans le menu du Hall.
- Vous êtes maintenant entré dans l’Expo.
- Vous pouvez déplacer votre avatar pour accéder aux "stands". À l'intérieur du stand, vous verrez une description de la communauté GC et un logo. Vous verrez également un "Espace de réunion". Il s'agit d'une réunion Zoom organisée par un représentant de cette communauté GC. Vous pouvez participer à cette réunion pour poser des questions au représentant. Si l'espace est inactif, vous ne pourrez pas vous y joindre. Vous ne pouvez vous joindre que lorsqu'un représentant est présent dans la réunion.
- Appuyez sur le bouton bleu "Participer" pour participer à la réunion Zoom.
- Pour en savoir plus sur l’Expo, cliquez ici (en anglais seulement)
- Après avoir suivi le processus d'accueil unique, vous serez placé dans l'espace d'exposition. Par défaut, votre avatar sera placé juste au-dessus de la zone d'accueil. À partir de là, vous pouvez faire naviguer votre avatar à travers l'étage en utilisant votre souris ou les touches fléchées de votre clavier de la manière suivante
- Pour utiliser la souris, cliquez sur l'endroit où vous voulez placer votre avatar. L'avatar se déplacera directement à l'endroit où vous avez cliqué.
- Vous pouvez cliquer pour avancer et utiliser votre souris pour cliquer/naviguer dans l'exposition.
- Vous pouvez cliquer et faire glisser l'étage de l'exposition (et l'étage du stand), en déplaçant le plan de l'étage à l'intérieur de votre fenêtre.
- Lorsque vous cliquez sur le plan et le faites glisser, votre avatar reste visible et conserve son emplacement.
- Lorsque vous cliquez sur Entrer dans le stand pour accéder à un stand, votre avatar se déplace vers le stand sélectionné.
- Pour utiliser les touches fléchées de votre clavier, utilisez les touches fléchées pour diriger votre avatar dans l'exposition.
- Vous pouvez également utiliser les touches +/- de votre clavier ou la molette de votre souris pour zoomer et dézoomer dans l'espace d'exposition.
Comment rejoindre les stands et les espaces
- Sur le plan de l'exposition, déplacez votre avatar jusqu'au stand que vous souhaitez rejoindre.
- Sur le stand, cliquez sur Entrer dans le stand.
- Vous rejoindrez d'autres participants dans le stand où vous verrez un espace de réunion (session de réunion) en cours.
- Les espaces actifs s'affichent avec la mention En cours
- Les espaces inactifs affichent le message suivant Cet espace est inactif. Veuillez revenir plus tard ! Cela signifie qu'aucune session active n'est disponible pour vous.
- Dans l'espace que vous souhaitez rejoindre, cliquez sur Rejoindre.
- Pour quitter le stand, cliquez sur Quitter le stand dans la barre d'outils de l'expo.
- Votre avatar sera placé à l'extérieur du stand sur le sol de l'exposition.
Comment réseauter
Cartes de profil et répertoire des personnes
- Pour modifier votre carte de profil. Allez sur les 3 lignes grises dans le coin supérieur droit, faites défiler vers le bas et cliquez sur "profil" (ou cliquez simplement sur la case avec vos initiales dans le coin supérieur droit). À partir de là, vous pouvez modifier vos informations.
- Cela permet aux autres utilisateurs de consulter votre fiche de profil dans le répertoire "Personnes".
- Vous pouvez entrer en contact avec d'autres participants en allant dans l'onglet "Personnes" du menu, en cliquant sur une fiche de profil et en cliquant sur le cercle bleu avec le signe plus. Vous pouvez clavarder avec cette personne en cliquant sur le bouton jaune avec la bulle de dialogue.
- Vous pouvez voir vos connexions dans la fonction Chat. En savoir plus sur la connexion avec d'autres participants (en anglais seulement).
- Pour en savoir plus sur les cartes de profil, cliquez ici (en anglais seulement) et pour en savoir plus sur les termes de réseautage et de profil de Zoom Events, cliquez ici (an anglais seulement).
Réseautage dans l'Expo
- Vous pouvez définir 3 statuts différents pour votre profil.
- Vous pouvez le définir comme suit :
- "Mode Networking" : Votre avatar affichera un anneau vert pour indiquer aux gens que vous êtes ouvert à la conversation et au réseautage. En outre, votre profil public sera affiché dans les zones publiques, par exemple dans l'annuaire des participants à un événement.
- "Mode découverte" : Votre avatar n'affichera pas d'anneau vert pour indiquer aux autres que vous êtes concentré sur l'événement, mais que vous aborderez d'autres participants lorsque vous serez prêt à le faire. Votre profil public sera affiché dans les zones publiques, par exemple dans l'annuaire des participants à l'événement
- "Mode Incognito” : Votre profil public sera caché dans les zones publiques telles que l'annuaire des participants à l'événement. Seuls votre nom et vos initiales seront affichés lorsque vous participerez à des événements. Les autres participants ne pourront pas vous trouver et interagir avec vous à moins que vous ne preniez l'initiative d'un contact, par exemple en envoyant un message dans les chats publics.
- Dans l’Expo, vous pouvez cliquer sur d'autres avatars/profils et vous connecter ou clavarder avec eux.
