Aslam.Ibrahim/Sandbox
[CNSC_Laboratory_ISO_17025_Accreditation| Home]]
|
|---|
| VOILÀ | At Your Service | PoC & RTC Documents | Contact Us |
| VOILÀ | At Your Service | PoC & RTC Documents | Contact Us |
| Home | Our Team | Our Product Development Cycle |
How We Work | Contact Us |
[1]CNSC laboratory achieves a milestone in ISO accreditation
Accreditation for gamma calibration services achieved, more to come
[2]Written by: Aslam Ibrahim
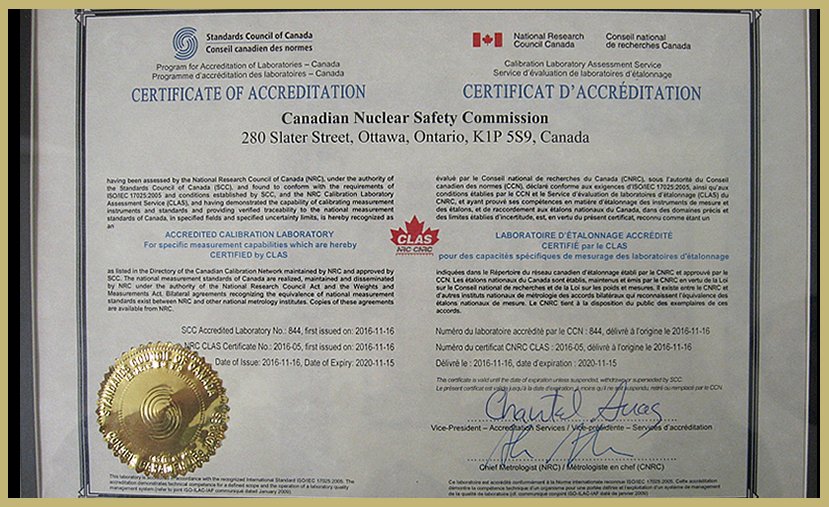
On November 16, 2016, the CNSC laboratory was granted accreditation to ISO/IEC 17025:2005, a standard used throughout the world to evaluate testing and calibration laboratories. The accreditation scope includes the calibration of working measurement standards, gamma survey meters, and personal electronic dosimeters – in short, a significant part of the CNSC laboratory’s calibration services.
Accreditation was granted by the Standards Council of Canada (SCC), under the Program for the Accreditation of Laboratories – Canada (PALCAN) and the National Research Council of Canada Calibration Laboratory Assessment Service (NRC CLAS).
It is notable that the CNSC laboratory is the first of its kind in Canada that the SCC has accredited for calibration of working measurement standards and survey instruments for gamma measurement.
For the purposes of this article, the term “working measurement standard” refers to a measuring instrument that is calibrated relative to a reference measurement standard (which is also a measuring instrument). The working and reference measurement standards each consist of an ion chamber and an electrometer that are combined as a single measurement system.
The laboratory maintains the reference measurement standard through annual calibrations that are performed by the NRC. The laboratory then calibrates the working measurement standard in-house by directly comparing it to the (calibrated) reference measurement standard. The calibration of the working measurement standards has also been accredited by SCC and NRC CLAS.
What is accreditation and why is it important?
Laboratory accreditation is a formal process of recognition by a third party organization to establish that a laboratory is technically competent and impartial. The CNSC laboratory was required to demonstrate its ability to produce precise and accurate test and calibration data, and to show the technical competence of staff. Learn more.
One reason that the CNSC pursued this recognition for the laboratory is because ISO/IEC 17025:2005 is an internationally accepted standard. Accreditation to such a standard provides formal recognition of competent laboratories throughout the world.
This recognition is important because, in all its efforts to fulfill its mandate, the CNSC strives continuously not only to achieve excellence in its operations, but also to foster public trust and confidence. The CNSC laboratory is no exception. With the calibration services becoming accredited by recognized bodies like the SCC and NRC CLAS, the CNSC laboratory has received a significant global mark of approval of high quality of its services. This in turn contributes to building public trust and confidence in the laboratory’s operations and the CNSC as a whole.
What did the accreditation process involve?
During this voluntary process, specialist technical assessors from NRC CLAS and NRC Measurement Science and Standards first conducted a thorough desktop assessment of the management system manual documentation and then a rigorous onsite evaluation of the laboratory’s processes, staff and equipment.
Upon concluding that the CNSC Laboratory met all requirements of the stringent ISO/IEC 17025:2005 standard, NRC CLAS recommended accreditation to the SCC, which reviewed the results of assessment and granted the recognition.
How do CNSC staff members (customers) and licensees benefit?
The results of the process showcase the technical and service-oriented capabilities of the CNSC laboratory, including highly professional technical staff, equipment, processes, and successful participation in proficiency testing. Together these features make the laboratory a leader in calibration services that are crucial for reliable radiation measurements – a key component of nuclear regulation.
The ISO/IEC 17025:2005 accreditation provides high confidence to both the regulator and licensees in the data used for key analyses and regulatory decisions.
What were the challenges the laboratory faced while preparing for accreditation?
Adapting all in-house MS Excel spreadsheets, writing procedures and work instructions to comply with all the ISO/IEC 17025:2005 standard requirements was certainly a big challenge. There are a lot of documents!
Another significant challenge was to find proficiency testing (PT) providers with appropriate measurement capabilities to meet ISO compliance requirements. The capabilities of the few established and reputable PT providers, such as the National Research Council of Canada (NRC), the National Institute of Standards and Technologies (NIST) and the International Atomic Energy Agency (IAEA), are limited to their well-characterized artefacts consisting of working measurement instruments for air kerma measurements. Their PT capabilities do not extend to field instruments such as personal dosimeters and gamma survey equipment.
It is important to note that the accreditation task presented to the Standards Council of Canada (SCC) and NRC CLAS, with the measurement scope that the CNSC laboratory sought, was the first of its kind for all three of these primary project stakeholders, and a first for Canada. The unique scope of accreditation turned out to be a challenge for the SCC and the NRC Calibration Laboratory Assessment Service (NRC CLAS), as the requirements for the analysis of measurement uncertainties and model equations, in addition to data analysis of the measurements and interpretation of the comparison of results from PT exercises are different from other physical and electrical metrological calibrations.
What’s next?
The current scope of accreditation includes working measurement standards for air kerma measurements, gamma survey meters, and personal electronic dosimeters. The CNSC laboratory has prepared a project management plan to extend the scope to include electronic and radiological calibrations of survey meters for gamma, neutron, alpha and beta radiation measurements, as well as energy calibrations of the spectrometers used for gamma and neutron measurements. There’s lots more to do!
How can CNSC staff members suggest improvements to the laboratory?
Through annual customer satisfaction surveys that the CNSC laboratory conducts, CNSC staff members who have used the laboratory services in the previous year can provide feedback on their quality, including suggestions for improvement. The CNSC laboratory has been conducting such surveys since 2015, and has taken action to address comments from its customers to meet its commitment to provide a high service level and meet customer expectations. One such action was to respond to the suggestion to provide links to instrument manuals from the laboratory’s Web page.
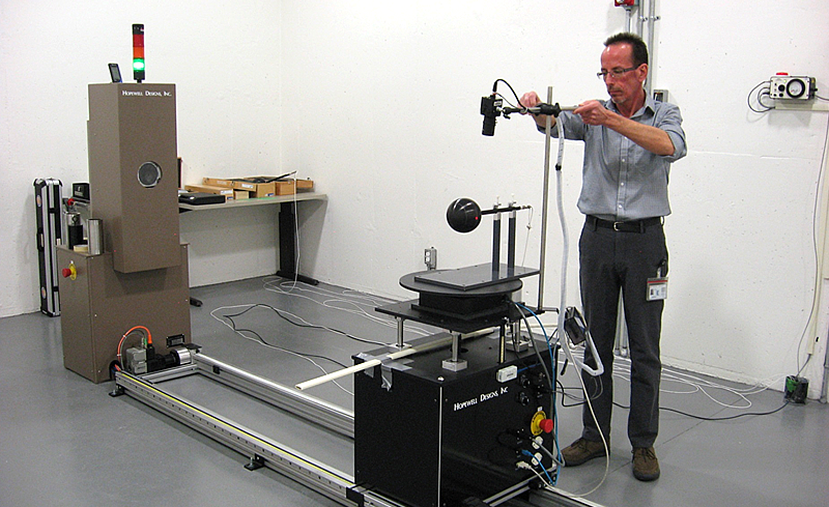
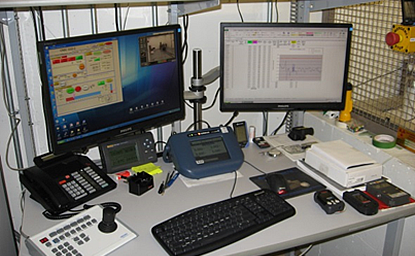
The CNSC laboratory gamma calibration service now operates within a quality management system that complies with the requirements of ISO/IEC 17025:2005. As specified in the quality management system, the laboratory implements mechanisms including, but not limited to, proficiency testing, customer satisfaction surveys, internal reviews, management reviews, and corrective and preventative actions to drive continual improvement, which is the true intention of the ISO/IEC standard. Control room for remote handling of equipment and sources during calibration
Summary of steps to set up an IFA with NRC
· CNSC Technical Authority contacts NRC Technical Authority to define the scope of work and schedule of work to be completed in the fiscal year
· Contact Finance by email to request the Finance contact person info to include in the IFA
Finance / Finance (CNSC/CCSN) <cnsc.finance-finance.ccsn@canada.ca>
· Provide the Finance contact person info to NRC Technical Authority to include in the draft IFA
· Once draft is provided by NRC Finance/Accounting for counter signatures, queue the IFA for Director LSD approval
· Once approved by Director LSD, provide a copy to CNSC Finance to commit funds and to provide REF code to include in the IFA.
· After REF code information is included in the IFA, submit the signed IFA to NRC Finance/Accounting Contact
· NRC Finance/Accounting to provide the IFA to CNSC Technical Authority with NRC counter signature
· Maintain the IFA in records
Contract processing timelines can vary greatly depending on the procurement strategy chosen and based on other factors that typically results in delays. Typical delay factors are: Complexity of the requirement; completeness of the statement of work and evaluation criteria; approval process; security; translation; supplier questions; bid evaluation process; manufacturing and delivery lead times.
Contract Award Service Standards – The Contract Award Service Standards outline the time it takes CMS to award a contract from the time a completed Contract Request Form is received and assigned to an officer. There are factors outside of the Contract Management Section’s (CMS) control that impact CMS’s ability to meet the contract award service standards listed below. However, CMS will strive to meet its contract award service standards at least 90% of the time.
| No. | Procurement Type | Contract Award Service Standard |
| 1 | · Non-competitive goods under $25K (tax incl.);
· Non-competitive services under $40K (tax incl.); · Purchases from standing offer; · Software purchases from software licensing supply arrangement |
5 weeks |
| 2 | · Temporary help services competitive contracts;
· Proservices competitive contracts; · Competitive furniture or audio-visual contracts; · Non-competitive service contracts greater than $40K (tax incl.) |
4 months |
| 3 | · Competitive contracts against supply arrangements (e.g. TBIPS, TSPS, PASS);
· Competitive service contracts from $40K to less than $105,700 (tax incl.) not covered by standing offers or supply arrangements |
5 months |
| 4 | · Competitive services from $105,700 to $3.75M (tax incl.) not covered by standing offers or supply arrangements | 6 months |
Note: The above timelines do not include contract requests that need to be sent to PSPC or SSC for processing (e.g. goods over $25K, research and development services, select IT hardware and software, public opinion research, advertising etc.)
The Contract Management Section (CMS) would be happy to discuss any aspect of your procurement needs. We suggest you contact CMS early in the procurement planning process, so we can determine the most appropriate procurement strategy for you.
1 Introduction
1.1 Customer Feedback
The CNSC Laboratory solicits customer feedback on an annual basis as one of the measurements of performance of the Laboratory Management System (LMS) ([Pcdocs://E-DOCS/4412335/R e-Docs-#4412335]) in regards to instrument management and calibration services. Customers can provide feedback to the Laboratory to address any issues which require immediate attention any time as needed, however, the annual survey provides an opportunity for customers to feedback on any aspect of the laboratory’s services including data quality and turnaround times. Any immediate problems as reported by the customers are to be documented and corrected through the non-conformance and corrective action processes following the Laboratory procedure P409 Corrective Action and Preventive Action in a timely manner by the Management System Officer (MSO).
Customer feedback is solicited to conform with the requirements of standards ISO/IEC 17025:2017, “General Requirements for the Competence and Testing of Calibration Laboratories”, and “SCC Requirements and Guidance for the Accreditation of Testing Laboratories – April 2018.”
1.2 Process
The MSO of the CNSC Laboratory conducts an electronic survey annually to collect feedback from CNSC staff members who have utilized the services of the Laboratory, and to collect any suggestions for improvement of the services, as per section 9.2.1 of the LMS.
Microsoft® Outlook based customer satisfaction survey form was used in this most recent customer satisfaction survey conducted in last year. Note that this form was designed and introduced in calendar year 2018 considering feedback from the customers to introduce a simple tool to provide feedback to the Laboratory. The Outlook email Voting button with a custom design offers to the customer to describe impressions of the services as Excellent, Good, Fair or No Impression, as described in the CNSC Laboratory Customer Satisfaction Survey Form F407.001 ([Pcdocs://E-DOCS/4429053/R e-Doc# 4429053]) which was used in previous years between 2014 and 2016. In addition, once the customer selected to respond to the invitation email with the selected impression of the service, the customer was offered an option to edit the response which may include any comments a customer may wish to have for the improvement of services.
After successfully conducting customer satisfaction surveys for years 2017 and 2018, CNSC Laboratory Customer Satisfaction Survey Form F407.001 ([Pcdocs://E-DOCS/4429053/R e-Doc# 4429053]) has now been retired and is no longer valid and available to use.
The survey results are used as an input into the management review process following the Laboratory procedure P415 Management Review ([Pcdocs://E-DOCS/4424239/R e-Doc# 4424239]). Any improvements suggested in the survey are implemented considering the available resources and benefit to the larger group of customers through the Laboratory procedure P409 Corrective Action and Preventive Action ([Pcdocs://E-DOCS/4425262/R e-Doc# 4425262]), and then followed and monitored through internal assessment process.
2 Methodology
The following preparatory steps were taken prior to execution of the survey:
1) A comprehensive list of customers that requested and received instrument services from the CNSC laboratory (i.e., the service “requestor”) during the 2018 calendar year was compiled from laboratory service records.
2) An invitation email was drafted in Microsoft® Outlook with a custom design Voting button, to be sent to each customer as a formal request for their participation in the annual customer satisfaction survey.
3) A telephone call/voice message was drafted to remind the customer the next day after the initiation of the survey.
4) A follow-up invitation email was drafted, to be sent as a reminder to each customer who had not responded to the initial request within a week time-period.
5) The list of customers was provided to the Laboratory’s administration staff to send the invitation email via Microsoft® Outlook with a custom design Voting button and other instructions regarding the data integrity of the feedback provided by the customers. Administration staff was to save the completed forms in the central electronic repository as e-access documents with appropriate access rights for maintaining lists of respondents and records as customers respond to the survey.
The following steps were taken subsequent to execution of the survey:
1) The feedback provided by the customers was analyzed and a summary ([Pcdocs://E-DOCS/5763601/1 e-Doc# 5763601]) was prepared to discuss the results of the survey with the stakeholders in order to implement the suggestions and any corrective actions to be taken to address the comments.
2) The results of the survey were summarized for the preparation of this summary report of the customer survey, as presented in this document.
3) If appropriate, an opportunity for improvement (OFI) as identified in the customer survey regarding LIMS requester module in addition to others as those identified in section 5 of this report will be filed using the Laboratory procedure P409 under the LMS and will be followed up to monitor the effectiveness of the implemented actions.
3 Results and analysis
3.1 Cohort
The cohort identified for the calendar year 2018 satisfaction survey numbered 60 customers in total, all of whom requested and received instrument services via 146 service requests fulfilled by the laboratory during the calendar year.
The demographic of the survey cohort represented a multi-disciplined sampling of individuals from various divisions and directorates within the technical support and regulatory operations branches of the CNSC, and from all regions of Canada in which the CNSC executes its’ mandate.
The services requested by the survey cohort during the calendar year included, but were not limited, to the following:
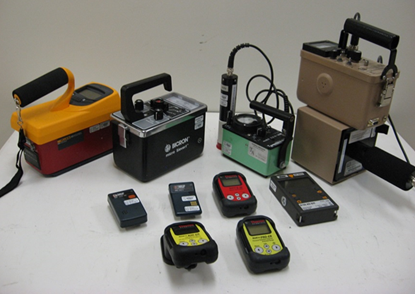
- Provision of calibration and repair services for field instruments, such as personal electronic dosimeters, gamma survey meters, contamination meters, neutron survey meters, passive detectors – bubble detectors, and radon progeny concentration monitoring equipment;
- Provision of inspection outfitting services, including logistical planning for shipping and return of field instruments and tools that are delivered on site by the laboratory, in step with the inspectors’ travel and divisional licensee inspection schedules;
- Provision of subject matter technical assistance and technical reviews regarding field instruments, radiation measurement, and licensee documents
- Provision of research and purchasing services to meet specified customer requirements regarding field instrumentation
- Provision of ‘rush’ services to meet immediate and urgent customer requirements
- Provision of outreach outfitting services that included field instruments, radioactive artifacts, and technical advice on the use of those items in outreach activities
3.2 Annual Customer Satisfaction Survey
The survey was executed during the spring and summer in 2018. All customers who were identified as requestors of instrument services during the calendar year 2018 were contacted via Microsoft® Outlook email with a formal invitation for their participation in the survey. Customers were given the choice to describe the impression of services as Excellent, Good, Fair or No Impression using the Voting button as well as an option to include any comments a customer may wish to have for the improvement of services.
A telephone call/voice message was used to remind the customer within few days after the initiation of the survey. Those customers who did not respond within few weeks of the initial formal request for participation were sent the reminder email in late summer same year.
3.3 Analysis
3.3.1 Customer Response to the Survey
Table 1 illustrates the proportion of customers who responded to the survey. The total cohort response yielded 43 responses and 8 non-responses, of possible 51 responses, for a final customer response rate of 84%. Out of 60 customers who were originally identified to seek feedback, 9 of them were not available to respond either because they were no longer working for CNSC or on extended leave. This response rate was relatively higher than that of previous surveys conducted for calendar years 2014, 2015, 2016, and 2017, as illustrated in Table 2. It also demonstrates an increasing trend since the inception of survey in 2014 as demonstrated in Figure 1. This increased participation in the survey could be apparently attributed to number of factors including the simplified form used this year as well as follow up phone calls/voice messages given to customers after initiating the survey.
Table 1: Analysis of the responses
| Number of Responses | Percentage of Customers Responded | |
| Total | 43 out of 51 | 84% |
Table 2: Comparison of current customer’s responses to previous years
| Survey Year | Percentage of Customers Responded |
| 2014 | 54% |
| 2015 | 55% |
| 2016 | 65% |
| 2017 | 77% |
| 2018 | 84% |
A.1. Preamble
This appendix presents an overview of variety of contamination monitoring equipment available within the Laboratory for fixed contamination monitoring, and swipe sample analysis for loose contamination monitoring (gross alpha and gross beta) to meet internal and external customer’s technical requirements. This appendix also discusses about the differences in the sensitivity of various models to different radiations and dimensions of the active surfaces of the detector probes in order to select appropriate calibration sources. A brief description of reference transfer equipment is also included in this appendix.
A.2. CNSC Laboratory Inventory
The CNSC Laboratory calibrates a variety of surface contamination survey meters and field sampling instruments. Survey instruments typically contain one or two detectors of specific types, such as a pancake Geiger-Mueller (GM) tube, a thin end-window GM tube, a thin window scintillation probe with a Bismuth Germanate (BGO) or Sodium Iodide (NaI(Tl)) crystal, or a large-area gas filled or scintillator proportional counter. Field sampling instruments typically contain either a NaI(Tl) or ZnS(Ag) scintillator with a tray designed to accept swipe samples.
A pancake GM tube with a sensitive area typically of 15 cm2, is used particularly for surface monitoring for alpha and beta (i.e.: particle) radiation, as well as gamma (photon) radiation. Sensitivity of these probes is particularly low for photon measurements.
A thin end-window GM tube with a sensitive area of approximately 6 cm2 has approximately the same sensitivity to particle radiation as the pancake probe, but it has a smaller, flat annular shape with a small window area that is utilized with a maximum of gas space. This geometry could effectively increase the sensitivity for photons to some extent, but typical end-window GM tube sensitivity will not be comparable to that of thin-window scintillation probes.
A thin-window scintillation probe exhibits excellent sensitivity for detection of low energy gamma photons, and is commonly used in nuclear medicine departments for detection of medical isotopes such as Tc-99m, Ga-67, Tl-201, In-111 and I-125, in addition to other low energy photon emitters such as Co-57, Cr-51.
A large–area, gas filled proportional detector of typical sensitive area on the order of 150 cm2 is used for detection of alpha, beta and gamma radioactive contamination on various surfaces, but primarily for scanning large areas of interest. Various fill gasses are used in different models, thereby varying the response to different radiation types. For example, a heavy noble gas such as Xenon is very responsive in detection of photons and high-energy beta particles.
The measurement display of these survey meters can be digital or analog or both, with measurement units typically expressed in counts-per-second (CPS), counts-per-minute (CPM), or in units of surface contamination (Bq/cm2). In some cases, external connectors (i.e.: usually BNC/SHV/MHV connectors) are used to connect the detector (listed in Table 1) with the scaler/rate meter as separate modules. In other cases, the probe and the rate meter are packaged as a single, compact unit. Such instruments usually require radiological calibration, and other models require both electronic calibration and radiological calibration. Those survey meters that require electronic validation are calibrated using traceable pulse generators to verify electronic response and sensitivity. Radiological calibration of these instruments requires a variety of alpha, beta and gamma calibration sources of varying areas, as applicable to fit the geometry of the various instrument probe areas and window shapes and sizes.
Each of these portable radiation protection instruments is to be calibrated using calibrated reference sources that are traceable to an accredited National Metrological Institute (NMI). The specific activity of various calibration sources should give rise to two deflection points of 20% and 80% on each analog scale, or on each decade of a digital scale.
The range calibration coefficient, at a given contamination level for a specific isotope, is determined as the ratio of the instrument-corrected reading to the traceable, NMI-certified source (surface) emission rate. The applied surface emission rate is verified locally using a reference transfer measurement standard.
In addition to meeting all other requirements under the standard, the instrument calibration report will include:
- Range calibration coefficient for a given geometry for isotopes of interest
- Minimum Detection Limit (MDL) for isotopes of interest
- Dependency on separation distance between surface and detector
A.3. Use of Contamination Field Instruments at CNSC
Table 1 lists various surface contamination meters that are currently in use within CNSC divisions at HQ and in regional offices. These instruments facilitate inspectors in the verification of radiological contamination levels on surfaces, whether to conform to regulatory requirements, or to conform to any administrative control levels that a licensee may have defined under the licensee’s radiation safety program. Note that these regulatory requirements are defined in units of Bq/cm2 for various classes of radionuclides.
Table A.1: Contamination meters currently in use in different divisions within CNSC
| Model | Detector | Comments |
| TBM-3S | GM Pancake probe | In service |
| TBM-6SP / LEG PROBE BG-1(N) | GM Pancake probe/ BGO LEG probe | In service |
| LB 124B | Xenon-filled proportional counter | In service, replaces LB-122 |
| Automess 6150 AD/AD-17 | End window GM tube to use with Automess 6150AD survey meter | In service |
| Automess 6150 AD/AD-K | Large area contamination monitoring probe to use with Automess 6150AD | In service |
| HP-260 / HP-360 /ASP-1 | GM Pancake probe | In use at UMMD |
| HP-210 / PRM-6 | Shielded Pancake GM detector | In use at SORO |
| RadEye B20 ER | GM Pancake probe | Recently introduced model |
Of the several instrument types listed in Table 1, the LB 124B (a large-area proportional counter) and the RadEye B20 ER (a pancake probe) can provide measurements of detected events in units of CPS or in terms of Bq/cm2. All other available instruments provide results in units of either CPS or CPM, which can then be converted to the required units of Bq/cm2 by applying the appropriate efficiency calibration coefficient. CNSC inspectors utilize surface contamination meters for relative measurements in order to compare with established background levels while assuming the reasonable sensitivity of the probe to the isotope of interest as established in the Laboratory environment. If the reading with a contamination meter is two to three times the background value (or greater), then the surface will be closely monitored with a swipe sample that will be measured in a low-background area using a calibrated contamination meter. In this fashion, the inspector has capability to verify whether the contamination is loose (contamination is present on the swipe) or fixed (no contamination present on the swipe). The inspector can then determine what regulatory requirements may apply for the identified level of loose contamination.
Table 2 lists detectors which are used in different models in use at CNSC. It is interesting to note that a large number of models use GM pancake probes which are most sensitive to alpha radiation and beta radiation and significantly low efficiency for gamma sources for all practical purposes.
Table A.2: Radiation sensitivity of contamination meters currently in use in different divisions within CNSC
| Detector | Models | Radiation Sensitivity | Area (cm2) |
| GM Pancake probe | TBM-3S, Internal probe TBM-6SP, HP-210, HP-260, HP-360, B-20 ER | α, β, γ sources calibration, extremely low γ sensitivity | 15 |
| End window GM tube | Automess 6150 AD / AD-17 | α, β, γ sources calibration, extremely low γ sensitivity | 7 |
| External BGO LEG probe | TBM-6SP | high γ sensitivity | 5 |
| Xenon filled proportional counter | LB 124B | b, γ sources calibration | 150 |
| ZnS(Ag) scintillation counter | LB 124 SCINT
RadEye HEC |
a, b sources calibration | 150 |
| Large area proportional detector | Automess 6150 AD / AD-K | α, β, γ sources calibration, extremely low γ sensitivity | 170 |
A.4. Reference transfer equipment
Reference transfer equipment which CNSC uses for periodic verification of a and b emission rates and gamma activity measurements of traceable calibration sources includes a large area planar NaI(Tl) planar detector, small diameter dual phosphor ZnS(Ag), a large area ZnS(Ag) scintillator detector for alpha and beta counting and a large area sealed gas proportional counter. Appendix on measurement traceability and secondary measurement standards provides details of the program for maintaining traceability of reference equipment.
| The corrected meter reading M is given by:
(3) where Mraw is the uncorrected meter reading as read directly from the instrument. PTP is the correction factor for air density, required when the temperature and pressure of the air in the cavity of the ionization chamber differ from the reference values of 22°C and 760.0 mm of Hg (101.325 kPa). At a temperature T (in degrees Celsius) and pressure P (in mm of Hg) the correct ion factor can be calculated from: (4) The air in the ionization chamber is assumed to be moist with the relative humidity in the range of 20% to 75%. Pleak is the correction factor to take into account any leakage or drift of the instrument readings in the absence of the radiation to be measured. If the instrument reading is represented by Mraw (Coulomb/s) and the leakage rate by B (Coulomb/s), Pleak has the effect of replacing Mraw by Mraw - B. The factor Pleak may be calculated from: (5) The only correction factors applied at the time of calibration are PTP and P1eak. The remaining factors, as discussed below, are not generally applied because these factors are not applicable under the circumstances of the calibration and the quantity of interest. Pion is the correction factor to take into account the incomplete collection of charge from an ionization chamber. Pion is taken to be unity because measurements with the reference standard are conducted under the same configuration (including the bias voltage) as those applied at NRC. Ppol is the correction factor used to take into account that, in general, changing the polarity of the charge being collected results in a change in its absolute value. Calibrations are performed at the same polarity as that used in the calibration of the reference standard at NRC. Pelec is the electrometer calibration coefficient. Calibration of the reference standard is performed at NRC for the ionization chamber and electrometer as a complete system so there is no separate electrometer factor and therefore no associated uncertainty. Prp is the correction factor to account for radial variation in the intensity profile of the radiation field over the sensitive volume of the ionization chamber. Prp is taken to be unity under the circumstances of the calibration. |
1: Measurements are made with the reference standard chamber to determine air kerma rate under reference conditions at the time of calibration.
Step 2: Measurements are made with the working standard for calibration by substitution.
In Step 1, the air kerma rate, Ka, at the point of measurement is determined according to the equation:
(1)
where is the calibration coefficient of the reference standard as calibrated by NRC for air kerma, and is the corrected meter reading of the reference standard as given by Eq. 3, under the conditions specified in this instruction. The correction factors usually applied at the time of calibration are PTP and P1eak.
In the step 2, the calibration coefficient of the working standard is obtained according to:
(2)
Where is the corrected meter reading of the working standard under the identical conditions of measurement as those established for the measurement of air kerma rate, Ka, given by Eq. 1.
